Growing potatoes in a container can be very productive and provides several benefits. Planting in containers helps protect your spuds against wireworms, voles, and other pests. Additionally, containers can be a great solution if you have a small garden space or rocky soil that is otherwise difficult to grow in. Follow the tips and techniques in this guide to successfully grow potatoes in containers.
When to Plant Potatoes in a Container
Potatoes can be planted outdoors in containers about 2 weeks before your last frost date. That said, if a late frost is expected, you may need to move your containers into a protected spot or cover them up until the weather improves.
Choosing the Right Container to Grow Potatoes
When you’re ready to start growing potatoes, first choose the right container. The type of container you choose to use is up to you. Just be sure to pick a pot that is adequately sized, has drainage holes, and is made of a food-safe material.
In general, one potato plant will need about 2.5 gallons of grow space, so if you want to keep potatoes in 10 gallon pots, you can usually fit about 4 potato plants per pot. Containers that are between 2 and 3 feet deep are ideal.
Fabric potato grow bags are a popular choice. These bags are easy to find and they come in a range of different sizes. They are also made of material that drains well, so you won’t need to worry about waterlogged soil.
Plastic buckets and bins are also commonly used for potato growing, although you will need to drill drainage holes in their base before use. If you opt for these containers, make sure they are made of food-safe plastic that will hold up outdoors. And don’t grow potatoes in materials like old tires, because these items may contaminate food crops with harmful chemicals.
Best Potato Varieties for Containers
Any potato type can be grown in containers. However, larger storage types of potatoes can become too cramped in pots and produce fewer spuds. Smaller types, such as fingerling potatoes, and varieties grown to harvest as small "new" potatoes are often better suited for containers and can produce more prolific harvests.
While it's tempting to try growing grocery store potatoes, keep in mind that these potatoes often don’t sprout well because they've been treated with growth inhibitors. They may also be carrying plant diseases. Seed potatoes from quality seed companies are usually the best option for home growers.
Steps for Planting Potatoes in Containers
1. Prepare seed potatoes.
Although you can plant whole potato tubers, most gardeners choose to cut their potatoes into chunks prior to planting to help their seed potatoes go further. When you prepare your potato pieces, make sure each section has at least 2 eyes or growth nodes. Then allow your potato pieces to sit out for several days so they can callus over before you plant them.
2. Add soil to container.
Locate your container in an area that receives at least 6 hours of direct sun daily, then add 2 to 3 inches of loamy, well-draining soil. (You'll fill the empty space in your container when hilling your potatoes as they grow.) Potatoes thrive in slightly acidic soil with a pH of between 5.2 and 6.0, as this pH helps ward against potato scab. Mix in some compost to provide a nutrient boost that will support your potatoes’ growth.
3. Set seed potatoes in container.
Plant your sections of potato in your containers with the potato eyes facing up. Space the seed potatoes about 10 inches apart from each other, and allow about 4 inches of space from the sides of the container.
4. Cover with soil.
Cover up your seed potatoes with about 2 inches of soil and water them well.
How to Care for Potatoes Growing in Containers
Watering
Potato plants growing in containers will need frequent watering, so it’s important that you check their soil every day or so. Potatoes should receive regular watering so that soil remains consistently moist, but never soggy. If you’re unsure if it’s time to water, insert your finger into your potatoes’ soil. If the top 1 to 2 inches of soil feels dry, it’s time to bring out your watering can or break out the hose. Another option is to set up a drip irrigation system.
Fertilizing
Mix in a diluted, liquid organic fertilizer into your potatoes’ water every few weeks. For example, a fish or kelp emulsion provides a mix of necessary nutrients.
Hilling
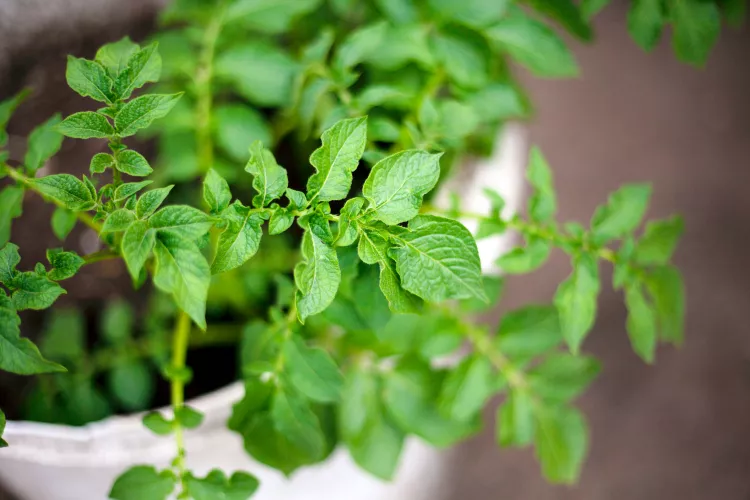
As your potato plants grow, they will also need to be hilled from time to time to protect the spuds from the sun and encourage more potatoes to develop. When your plants are about 6 inches tall, add several inches of soil to the base of your plants. The hilled soil should reach about 1/3 up your plant and it may cover up some of the plant’s lower leaves.
Continue hilling your plants every few weeks as they grow until they reach the top of your containers. Potatoes are fast growers, so this may take less time than you expect.
How and When to Harvest Potatoes in Containers
Potatoes can be harvested any time after they flower, which usually occurs in mid- to late summer. Depending on the variety, this can be in about 3 to 4 months from planting. To harvest just a few potatoes, reach down into your containers and pull the largest tubers free.
Alternatively, you can wait a few more weeks until the entire potato plant begins to yellow and die back. Then you can carefully lift the whole plant out of the soil or dump the entire container out onto a plastic tarp for even easier harvesting. The tubers will detach easily from the plant. Then you can wash them off and use them in all your favorite potato recipes.
